Fried Boards and Blown Fuses: The Maker's Complete Guide to Sizing Your Power Supply Right
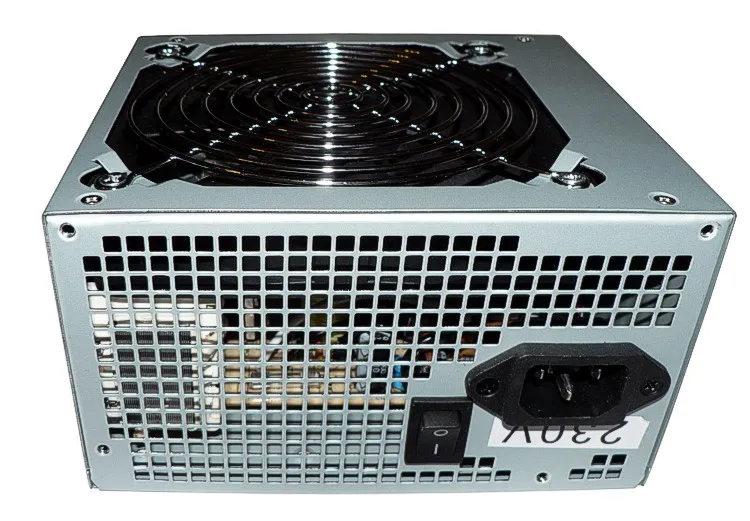
Photo: Baran Ivo, Public domain, via Wikimedia Commons
Let's be honest: most of us have been there. You spend a weekend wiring up a beautiful LED matrix or a motor-driven robot arm, flip the switch, and watch it immediately reboot, brown out, or—if you're really unlucky—release the magic smoke. Nine times out of ten, the culprit isn't your code or your soldering. It's the power supply.
Power delivery is one of the most underestimated parts of any DIY electronics build. It's not glamorous. It doesn't show up in YouTube thumbnails. But get it wrong, and nothing else matters. So let's fix that.
Why Makers Keep Underestimating Power Draw
The most common mistake is treating the power budget like an afterthought. You spec out your microcontroller, your sensors, your motor drivers—and then grab whatever 5V wall wart is sitting in the junk drawer. That works fine for blinking an LED. It absolutely does not work for anything with real current demands.
Here's the thing about power requirements: components don't always draw what the datasheet says they will at steady state. They draw surge current at startup. Motors especially are notorious for this—a motor rated at 500mA continuous can pull 3–5x that on startup. Same goes for capacitors charging up, relays clicking, and even some LED driver ICs during initialization. If your PSU can't handle those instantaneous spikes, you'll see voltage sag, resets, or outright failure.
Another sneaky culprit is thermal derating. A cheap 2A power supply might technically output 2A—but only at room temperature. Stuff it inside a project enclosure without airflow and that rating can drop significantly. The specs on the label assume ideal conditions that your build almost certainly doesn't have.
Running the Numbers: A Practical Power Budget
Before you buy anything, build a power budget. It sounds tedious but it takes maybe 15 minutes and can save you hours of debugging.
Start by listing every component in your build and pulling the maximum current draw from its datasheet. Don't use typical values—use the max. Add those up. That's your baseline load.
Now apply a safety margin. A good rule of thumb in the maker community is to run your PSU at no more than 70–80% of its rated capacity under normal operating conditions. So if your total load comes out to 2A, you want a supply rated for at least 2.5A, and ideally 3A. That headroom handles surges, gives the supply room to breathe thermally, and extends its lifespan.
For multi-voltage builds—say, a project that needs 5V for logic and 12V for motors—don't try to power everything from a single rail unless you're using a proper buck/boost converter setup with adequate current ratings on each rail. Mixing voltage domains through a single cheap supply is a recipe for ground loops and noise problems that'll make your sensors behave like they're haunted.
Real-World Failure Modes: A Few Horror Stories
One common scenario in the maker community goes like this: a builder wires up an addressable LED strip—something like WS2812Bs—and powers the whole thing from a Raspberry Pi's 5V GPIO pin. The Pi technically outputs 5V, so what's the problem? The problem is that the Pi's onboard regulator is only rated for a few hundred milliamps of external load. With 60 LEDs at full white, you're asking for close to 3.6A. The Pi throttles, the LEDs flicker, and eventually the regulator overheats.
Robotics projects run into similar issues. A four-wheel drive chassis with hobby DC motors might look manageable on paper—four motors at 800mA each is 3.2A total, easy. But under load, climbing an incline, or recovering from a stall, those motors can spike hard. Without a PSU that has both the current headroom and proper overcurrent protection, you're rolling the dice every run.
Matching PSU Type to Your Project
Not all power supplies are created equal, and the form factor matters as much as the specs.
Wall adapters (AC-DC bricks): Fine for low-current projects under 2A. Look for UL-listed units and check whether the output is regulated. Unregulated adapters can output significantly more voltage than labeled under light load, which can damage sensitive components.
Switching bench supplies: The gold standard for development work. A variable bench supply with adjustable current limiting lets you dial in exactly what you need and set a current cap so a wiring mistake doesn't fry your board. Brands like Korad and Riden offer surprisingly capable units in the $40–$80 range.
PC ATX supplies: Massively underutilized in the maker world. A salvaged ATX PSU gives you 3.3V, 5V, and 12V rails with serious current capacity—often 20A or more on the 12V rail. They're fantastic for high-current robotics or large LED installations. You'll need a paperclip or ATX breakout board to power one on without a motherboard, but that's a five-minute hack.
LiPo/battery packs: For portable builds, lithium polymer batteries are popular, but they introduce their own complexity. Always use a proper battery management system (BMS) to prevent overcurrent and over-discharge. A bare LiPo cell with no protection circuit is a fire hazard waiting to happen.
Thermal Management: The Part Everyone Ignores
Even a correctly sized supply can fail if it can't shed heat. If your PSU lives inside a sealed enclosure, you need to think about airflow. A small 40mm fan pulling air through the case can make a dramatic difference in operating temperature and long-term reliability.
For onboard regulators—like the common AMS1117 or LM7805—check the thermal resistance specs and add a heatsink if you're pushing more than about half an amp through them. These little TO-220 and SOT-223 packages get surprisingly hot under load, and heat is the number one killer of component lifespan.
Thermistors or dedicated temperature monitoring ICs (the TMP36 is a classic for a reason) can give you real-time visibility into what's happening thermally inside your build. If you've got a microcontroller in the loop anyway, logging temperature over time costs you almost nothing and can reveal problems before they become failures.
The Bottom Line
Power delivery isn't the exciting part of a build. But it is the foundational part. A few extra minutes with a spreadsheet, a PSU with some breathing room, and a little attention to heat can be the difference between a project that runs reliably for years and one that lives in the parts bin of shame.
Do the math. Buy the margin. Keep it cool. Your future self will thank you.