Old Silicon, New Tricks: How to Hunt Down and Resurrect Vintage Circuit Boards Before They Vanish
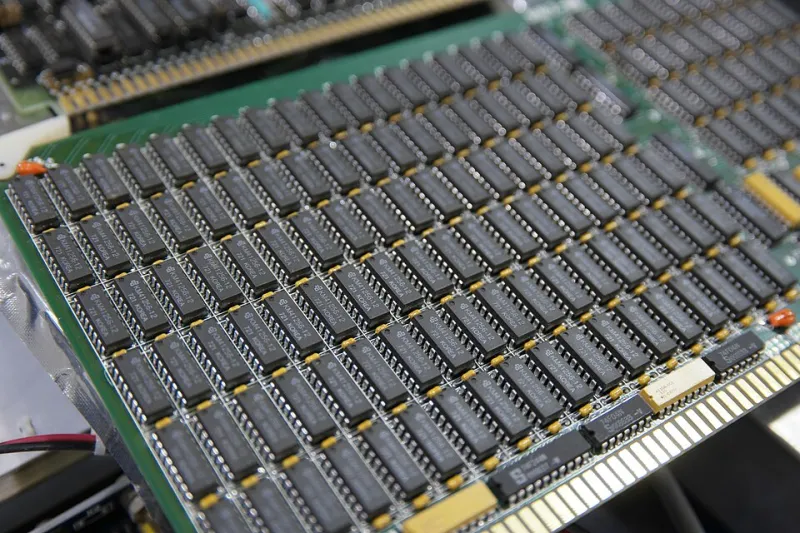
Photo: Kevin Savetz, CC BY 2.0, via Wikimedia Commons
Something interesting has been happening at thrift stores, estate sales, and online auction listings across the US over the past few years. Dusty old computers that used to sell for five bucks at a Goodwill—if they sold at all—are now commanding serious money. An Apple IIe in decent shape might fetch $200. A working Commodore 64 with its original power supply? Closer to $150–$300 depending on condition. And don't even get started on early Macintosh hardware or anything with an Intel 8080 on the board.
The retro computing revival is real, it's accelerating, and if you're a hardware enthusiast who hasn't paid attention to it yet, you're already a little late. But not too late—if you know where to look and what to do with what you find.
Why Makers Are Going Retro
It's tempting to write this off as pure nostalgia. And sure, some of it is. But there's more going on here than middle-aged engineers getting misty-eyed about the computers they had as kids.
For a lot of makers, vintage hardware represents something genuinely compelling from a technical standpoint: simplicity. A 6502-based system like the Apple II or the original NES has an architecture you can hold in your head. The entire memory map fits on a single page. There are no hypervisors, no UEFI firmware stacks, no layers of abstraction between you and the bare metal. When you write to a memory address, something physical happens. That's an increasingly rare experience in modern computing, and it's a powerful teaching tool.
There's also the challenge factor. Diagnosing and repairing a 40-year-old board requires real skills—reading schematics, using an oscilloscope, understanding analog signal behavior. It's the kind of hands-on work that separates people who use electronics from people who genuinely understand them.
And then yes, there's the nostalgia. Let's not pretend that doesn't matter.
Where to Find Classic Hardware Without Getting Burned
The hunting ground has shifted dramatically. The days of stumbling across a working TRS-80 at a garage sale for $10 are mostly over. Here's where the action actually is right now:
eBay remains the biggest marketplace, but pricing has become aggressive. The key is to search for untested, as-is, or lot listings. A "lot of vintage computer parts" from an estate sale often includes working boards that the seller didn't know how to test. You're taking a risk, but you're also paying a fraction of what a tested-working unit goes for. Filter by "sold listings" to calibrate your expectations before bidding.
Facebook Marketplace and Craigslist still occasionally surface deals, especially in the Midwest and rural areas where old hardware sat in storage for decades without anyone knowing its value. Set up saved searches and check them regularly. Speed matters—good finds move fast.
Hamfests (amateur radio swap meets) are criminally underrated for vintage computer hardware. These events, held in cities and fairgrounds across the country, draw sellers who often have deep storage of old electronics. The VCF (Vintage Computer Festival) events held in the Bay Area, New Jersey, and other locations are even more targeted—serious collectors and repairers show up to buy, sell, and trade.
Local repair shops and electronics recyclers sometimes have boards they've pulled from donated equipment. It's worth calling around. Some recyclers will let you dig through bins for a flat fee.
Diagnosing What You've Got: First Steps
So you've scored a vintage board. Now what? Before you plug anything in, do a visual inspection. Look for:
-
Capacitor plague: Bulging, leaking, or corroded electrolytic capacitors are the single most common failure mode on boards from the late 1980s through the early 2000s. Taiwanese manufacturers during that era used a flawed electrolyte formula, and those caps have been failing ever since. You'll often see brown or crusty residue around the base of the cap. This is fixable—but it requires recapping the board, which means desoldering every affected cap and replacing it with a quality modern equivalent.
-
Battery leakage: Many vintage boards used onboard lithium or NiCd batteries to retain BIOS settings or save data. These leak. Badly. Alkaline and NiCd leakage can destroy PCB traces if left long enough. Check around any coin cell or barrel battery holder for corrosion.
-
Physical damage: Cracked traces, burned components, and broken edge connectors are all repairable but require progressively more skill. Cracked traces can often be bridged with solder or conductive pen. Burned components need identification and sourcing—which brings us to the parts problem.
The Parts Problem (and How Enthusiasts Solve It)
Sourcing components for 30- and 40-year-old boards is its own adventure. Some chips are still available new-old-stock (NOS) through specialty suppliers like Jameco, Mouser, or the endless storefronts on AliExpress (buy with appropriate skepticism). Others have been out of production for decades.
The retro computing community has responded with some creative solutions. Projects like the RC2014 produce modern recreations of classic chips. FPGA-based replacements for vintage processors and custom chips are increasingly common—the MiSTer project, for instance, lets you run accurate hardware emulation of dozens of classic platforms on a modern FPGA board. And community-maintained chip databases like VGMPF and the forums at forums.vintagecomputer.net are invaluable for tracking down obscure part numbers.
Retrobriting: Bringing Back That Original Color
If you've ever seen a yellowed Commodore keyboard or an Apple II case that looks like it's been soaked in coffee, you've encountered the photodegradation that affects ABS plastic containing HBCD flame retardant. The good news: it's largely reversible.
The most popular method is "retrobriting" with hydrogen peroxide. The classic approach involves coating the plastic in high-concentration hydrogen peroxide cream (the kind sold for hair bleaching at Sally Beauty Supply) and exposing it to UV light—either sunlight or a UV lamp—for several hours. The UV activates the peroxide, which reverses the oxidation and restores the original cream or off-white color.
It works remarkably well, though it requires patience and some trial and error with timing. Leave it too long and you can bleach the plastic unevenly. The community at Vintage Computer Federation forums has dialed in the technique over years of experimentation, and their guides are worth reading before you start.
The Clock Is Ticking
Here's the uncomfortable truth about vintage hardware: it's not getting more plentiful. Every year, more boards fail beyond economic repair, more storage units get cleaned out and sent to recycling, and more of this hardware simply ceases to exist. The window for finding certain machines in restorable condition is closing.
That's not meant to be doom and gloom—it's an argument for urgency. If you've been curious about retro computing, now is the time to start. Learn to recap a board. Get comfortable with an oscilloscope. Dig through a hamfest bin. The skills you'll develop are genuinely transferable to modern hardware work, and the satisfaction of bringing a 40-year-old machine back to life is something that a fresh-out-of-the-box dev board just can't replicate.
The old silicon still has plenty of tricks left to teach.