The Thermal Interface Truth Test: We Benchmarked 8 Materials So You Don't Have to Guess
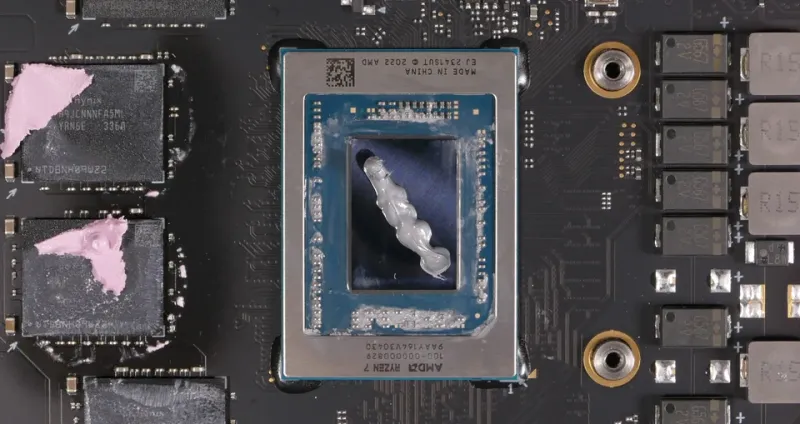
Photo: System76, CC BY-SA 4.0, via Wikimedia Commons
Few topics in the hardware hobby world generate more confident, contradictory opinions than thermal interface materials. Spend ten minutes in any PC building subreddit and you'll find passionate arguments about brand loyalty, application technique, and whether liquid metal is reckless or genius. Most of those arguments are light on data and heavy on vibes.
We wanted to do better. So we rounded up eight thermal interface materials — spanning budget pastes, mid-range standards, premium compounds, thermal pads, and phase-change materials — and ran them through a structured set of benchmarks on the same hardware under controlled conditions. Here's what we found, and more importantly, here's the why behind the numbers.
A Quick Physics Primer (Bear With Us)
Before we get to the results, it helps to understand what thermal interface materials are actually doing. No matter how flat your CPU heatspreader looks or how precisely machined your cooler base is, there are microscopic air gaps between those two surfaces. Air is a terrible thermal conductor — roughly 0.025 W/m·K. Copper sits around 385 W/m·K. The whole job of a TIM is to fill those gaps with something that conducts heat better than air.
Thermal conductivity is measured in watts per meter-kelvin (W/m·K), and manufacturers love to plaster this number on their packaging. Here's the catch: that rating is measured in lab conditions on a standardized test setup. Real-world performance depends on bond line thickness (how thin you can spread the material), how well it fills microscopic surface irregularities, and whether it stays stable over time and temperature cycles. A paste rated at 12 W/m·K that goes on thick can easily underperform one rated at 6 W/m·K applied in a thinner, more consistent layer.
Keep that in mind as we dig into the results.
Test Setup and Methodology
All testing was done on an AMD Ryzen 9 7900X mounted in an open-air test bench with a mid-range 240mm AIO cooler. We ran a 15-minute Cinebench R23 multi-core loop to stress the CPU, then recorded peak and average package temperatures using HWiNFO64. Each material was installed three times and results were averaged to account for application variance. Ambient temperature was held at 72°F throughout testing using a climate-controlled room.
For each application, we used the standard pea-method (a rice-grain-sized dot in the center) unless the manufacturer specifically recommended otherwise. We let each paste cure for two full thermal cycles before recording final numbers.
The Lineup
- Arctic MX-6 (mid-range, non-conductive, ~$10)
- Thermal Grizzly Kryonaut (premium, non-conductive, ~$15)
- Noctua NT-H2 (premium, non-conductive, ~$13)
- Cooler Master MasterGel Maker (high-conductivity paste, ~$12)
- Generic silicone paste (budget, pulled from a no-name CPU cooler box)
- Thermal Grizzly Conductonaut (liquid metal, ~$18)
- Thermal Grizzly Minus Pad 8 (thermal pad, 1mm, ~$15 per sheet)
- Fujipoly XR-m (phase-change pad, ~$20 per sheet)
The Results — and What They Mean
Budget vs. Mid-Range: Smaller Gap Than You Think
The generic silicone paste pulled from a bundled cooler box came in last, as expected — but only by about 6°C at peak load compared to the Arctic MX-6. That's meaningful if you're pushing a hot chip hard, but for a casual workstation build running stock clocks? You'd never feel it.
The MX-6 continues to be one of the best value picks in the category. It performed within 2°C of the Kryonaut in our tests, costs less, and is non-electrically-conductive, which matters if you're sloppy with application. For 90% of builds, this is the answer.
The Premium Paste Plateau
Kryonaut and NT-H2 traded blows within our margin of measurement error — we're talking less than 1°C difference between them under the same conditions. Both are excellent. Neither is dramatically better than MX-6 in real-world use. If you're not overclocking aggressively, the premium price premium is hard to justify on performance grounds alone. Buy whichever is cheaper at the time.
The MasterGel Maker's high-conductivity claims didn't pan out the way the marketing suggests. It performed roughly on par with Kryonaut, not ahead of it. Bond line thickness matters, and this paste's slightly thicker consistency likely offset some of its theoretical conductivity advantage.
Liquid Metal: Real Gains, Real Risks
Conductonaut is where the numbers get interesting. We saw an 8–11°C drop compared to Kryonaut under full load. That's not a rounding error — that's a genuine, meaningful improvement, especially relevant for overclocking headroom or managing a hot chip in a thermally constrained case.
But here's the thing: liquid metal is gallium-based, which means it will corrode aluminum and damage certain nickel plating over time. You need to know your cooler's base material before you even open the tube. It's also electrically conductive, so stray application near capacitors or VRMs is a real hazard. For delidded CPUs or extreme overclock builds where you've done your homework, liquid metal is legitimately worth it. For a standard cooler swap on a stock-clocked gaming rig? Probably not worth the risk.
Thermal Pads: The Right Tool for Specific Jobs
The Minus Pad 8 and Fujipoly XR-m both ran warmer than the best paste options — 4–7°C behind Kryonaut at peak load. That sounds like a loss, but it's missing the point. Thermal pads exist for situations where paste doesn't work: VRAM modules, M.2 SSD controllers, GPU memory chips, and any component where you need consistent thickness across an uneven surface. For those applications, a quality pad beats a smear of paste every time. Just don't use a pad where paste is the right call, and vice versa.
The Fujipoly phase-change material was intriguing — it softens and conforms more aggressively at operating temperature — but the real-world delta over the Minus Pad 8 was under 2°C in our testing. Hard to call that worth the price premium.
So What Should You Actually Buy?
Here's the practical takeaway distilled from all of this:
Standard builds and daily drivers: Arctic MX-6. Full stop. It's non-conductive, easy to apply, performs within a few degrees of anything else, and costs less than a fast food lunch.
Serious overclockers with compatible coolers: Thermal Grizzly Conductonaut. The gains are real. Do your homework on materials compatibility first.
GPU VRAM, M.2 drives, and similar components: Thermal Grizzly Minus Pad 8 or equivalent quality thermal pad sized to your component thickness.
Everyone else: Stop overthinking it. The application technique — getting a thin, consistent layer with no air bubbles — matters more than the brand on the tube. A perfectly applied mid-range paste beats a poorly applied premium one every single time.
The physics don't care about the marketing. Your temperatures will tell you the truth.